×
ToyotaParts- Hello
- Login or Register
- Quick Links
- Live Chat
- Track Order
- Parts Availability
- RMA
- Help Center
- Contact Us
- Shop for
- Toyota Parts
- Scion Parts
My Garage
My Account
Cart
OEM Toyota MR2 Spyder Timing Chain
Engine Timing Chain- Select Vehicle by Model
- Select Vehicle by VIN
Select Vehicle by Model
orMake
Model
Year
Select Vehicle by VIN
For the most accurate results, select vehicle by your VIN (Vehicle Identification Number).
1 Timing Chain found


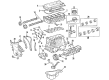
Toyota MR2 Spyder Timing Chain
Part Number: 13506-0D010$260.60 MSRP: $372.07You Save: $111.47 (30%)Ships in 1-3 Business Days
Toyota MR2 Spyder Timing Chain
Choose genuine Timing Chain that pass strict quality control tests. You can trust the top quality and lasting durability. Shopping for OEM Timing Chain for your Toyota MR2 Spyder? Our website is your one-stop destination. We stock an extensive selection of genuine Toyota MR2 Spyder parts. The price is affordable so you can save more. It only takes minutes to browse and find the exact fit. Easily add to cart and check out fast. Our hassle-free return policy will keep you stress-free. We process orders quickly for swift delivery. Your parts will arrive faster, so you can get back on the road sooner.
The Toyota MR2 Spyder model was manufactured between 1999 and 2007 with the car being highly acclaimed for the great performance and durability owed to the Timing Chain assembly. Timing belt/s synchronises the camshaft and crankshaft so that the valves fire in the correct sequence for efficient combustion. While the Toyota MR2 Spyder employs a metal Timing Chain instead of the more conventional rubber timing belt, users will find that it is very robust, that is not prone to wear and tear of the same nature as the traditional rubber timing belt and therefore it will not need as many replacements nor will it cause the same uneasiness among the car's enthusiasts. Lubrication of the Timing Chain is critical in specific instances, while, normally, there isn't much wear apparent; nonetheless, the tensioner and chain guides should be carefully monitored for problems in advance. On transformation, the Toyota MR2 Spyder has been established to support a host of models such as the B, Standard, and the S trims to appeal more markets. Another power plant is the 1.8 L 1ZZ-FED inline four-cylinder with a 5-speed manual or the 6-speed Smart Sequential Mount Manual Transmission ramps up the drive making the MR2 Spyder a best-seller among sports car enthusiasts. The Timing Chain does a lot more than perform for the car; it also is useful in keeping safety in sharp focus because of the role it has to play in maintaining the integrity of the engine. Due to aspects such as the demonstration of both engineering prowess and spirited performance, the Toyota MR2 Spyder provides a wonderful distinction in the automotive market and the Timing Chain is one component that denotes its place in the list of legendary droptop sports cars.
Toyota MR2 Spyder Timing Chain Parts and Q&A
- Q: How to service and repair the timing chain on Toyota MR2 Spyder?A:The first steps for timing chain servicing start with draining engine coolant followed by removing the rear suspension upper brace, engine under covers, Drive Belt and generator as well as drive belt idler. Completion of this step requires removal of two bolts, two nuts along with the idler component. Start by placing a jack with a wood or rubber block under the oil pan before uninstalling 3 engine mounting bolts and 3 nuts and then the right-hand insulator along with ignition coils and the cylinder head cover. After disconnecting 2 PCV hoses along with the noise filter and heated oxygen sensor (bank 1 sensor 1) connector, users should detach 9 bolts, 2 nuts and 2 seal washers. Take out the bolt that holds the oil dipstick and guide before disconnecting the two connectors and wire bracket. Set the No. 1 cylinder to TDC/compression position by lining up the crankshaft pulley groove with timing mark 0 and checking that camshaft timing sprocket and VVT timing sprocket point marks are properly positioned. Disengage the crankshaft pulley using Special Service Tool: 09213-70011, 09330-00021 and Stool: 09950-50013 (additional possible tools: 09951-05010, 09952-05010, 09953-05020 and 09950-05021). To perform the task remove 11 bolts and a nut along with the drive belt tensioner right-hand engine mounting bracket chain tensioner Water Pump crankshaft position sensor and timing chain cover by carefully prying off the components. The technician removes the crankshaft position sensor plate while also removing the chain tensioner slipper along with the timing chain, crankshaft timing sprocket, and VVT timing sprocket from the system but takes care to prevent damage to the cylinder head and valve lifter. The technical service procedure requires inspecting the timing chain along with its sprockets for elongation and diameter as well as checking the drive belt idler's rotation and measuring the chain tensioner slipper and vibration damper for wear. Additionally, inspect the chain tensioner and examine the oil jet. The technician should replace the crankshaft front oil seal through Special Service Tool: 09309-37010 while the timing chain cover is removed but should utilize Special Service Tool: 09308-10010 when it remains installed. Perform the drive belt idler bearing replacement using Special Service Tools: 09950-60010 (09951-00240), 09950-70010 (09951-07100) due to their bearing insertion and extraction capabilities. First install the camshaft timing sprocket and VVT timing sprocket while aligning their timing marks and set the No. 1 cylinder at TDC/compression position before adding the chain vibration damper and timing chain and crankshaft timing sprocket. Secure the chain tensioner slipper, crankshaft position sensor plate, timing chain cover, water pump with new O-rings while using Part No. 08826-00100 and 08826-00080 for the specified seal packing. Secure the right-hand engine mounting bracket to its threaded holes while using seal packing and then install the drive belt tensioner and crankshaft position sensor and crankshaft pulley by using Special Service Tools 09213-70011 and 09330-00021 and the chain tensioner. The chain tensioning procedure should be completed before installing the oil dipstick and guide along with the cylinder head cover using its new gasket and right-hand engine mounting insulator and a new gasket on the No. 2 cylinder head cover. The drive belt idler and generator with new drive belt are installed before placement of engine under covers and suspension upper brace. Engine start-up follows for coolant leak testing.

Related Toyota MR2 Spyder Parts
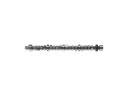 Toyota MR2 Spyder Camshaft
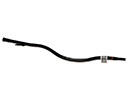 Toyota MR2 Spyder Dipstick Tube
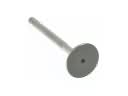 Toyota MR2 Spyder Exhaust Valve
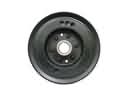 Toyota MR2 Spyder Harmonic Balancer
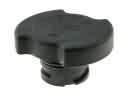 Toyota MR2 Spyder Oil Filler Cap
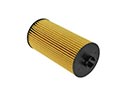 Toyota MR2 Spyder Oil Filter
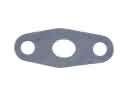 Toyota MR2 Spyder Oil Pump Gasket
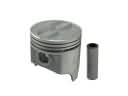 Toyota MR2 Spyder Piston
 Toyota MR2 Spyder Piston Ring Set
 Toyota MR2 Spyder Rod Bearing
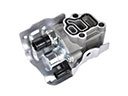 Toyota MR2 Spyder Spool Valve
 Toyota MR2 Spyder Variable Timing Sprocket