×
ToyotaParts- Hello
- Login or Register
- Quick Links
- Live Chat
- Track Order
- Parts Availability
- RMA
- Help Center
- Contact Us
- Shop for
- Toyota Parts
- Scion Parts
My Garage
My Account
Cart
OEM Toyota Yaris Sway Bar Kit
Stabilizer Sway Bar Set- Select Vehicle by Model
- Select Vehicle by VIN
Select Vehicle by Model
orMake
Model
Year
Select Vehicle by VIN
For the most accurate results, select vehicle by your VIN (Vehicle Identification Number).
5 Sway Bar Kits found


Toyota Yaris Stabilizer Bar, Front
Part Number: 48811-WB001$62.57 MSRP: $87.83You Save: $25.26 (29%)Ships in 1-3 Business Days


Toyota Yaris Stabilizer Bar, Front
Part Number: 48811-52240$112.92 MSRP: $158.50You Save: $45.58 (29%)Ships in 1-3 Business Days
Toyota Yaris Stabilizer Bar, Front
Part Number: 48811-52170$113.04 MSRP: $158.66You Save: $45.62 (29%)Ships in 1-3 Business DaysToyota Yaris Stabilizer Bar, Front
Part Number: 48811-52160$110.43 MSRP: $155.01You Save: $44.58 (29%)Ships in 1-3 Business Days

Toyota Yaris Stabilizer Bar, Front
Part Number: 48811-0D150$92.54 MSRP: $129.89You Save: $37.35 (29%)Ships in 1-3 Business Days
Toyota Yaris Sway Bar Kit
Choose genuine Sway Bar Kit that pass strict quality control tests. You can trust the top quality and lasting durability. Shopping for OEM Sway Bar Kit for your Toyota Yaris? Our website is your one-stop destination. We stock an extensive selection of genuine Toyota Yaris parts. The price is affordable so you can save more. It only takes minutes to browse and find the exact fit. Easily add to cart and check out fast. Our hassle-free return policy will keep you stress-free. We process orders quickly for swift delivery. Your parts will arrive faster, so you can get back on the road sooner.
Toyota Yaris Sway Bar Kit Parts and Q&A
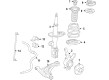
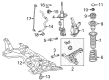
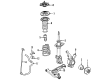
- Q: How to install the front Sway Bar Kit and related components on Toyota Yaris?A:Begin the front sway bar kit installation by fitting the sway bar bush to the bar which should have its bush stopper pointed toward the outside of the vehicle and its cutout directed toward the front. Place the sway bar kit onto the crossmember that has a paint mark along the left side of the vehicle. Start by tightening bolt A of the front sway bar bracket LH provisionally then follow up with bolting B then A to reach 47 Nm (479 kgf-cm, 35 ft-lbf) torque. Perform the identical installation process for the right-hand front sway bar bracket. Install the power steering gear and then the front suspension crossmember sub-assembly. When installing the sway bar link for the front sway bar link assembly LH it must be secured by using 2 nuts while maintaining the stud with a socket hexagon wrench 6 if the ball joint starts to turn with the nut. The installation process for the front sway bar link assembly RH matches exactly what is needed for the LH side. Both front lower suspension arm installation and tie rod end sub-assembly installation should follow the same procedures for the left-hand and right-hand side. Fasten together the steering column hole cover sub-assembly with the steering sliding yoke sub-assembly and the column hole cover silencer sheet. Install the front wheel by tightening it to 103 Nm (1,050 kgf-cm, 76 ft-lbf) then set wheels in a straight forward direction. Necessary components for installation include the outer cowl top panel, cowl to register duct sub-assembly for hatchback and front air shutter seal for sedan and the combination of front Wiper Motor and link with cowl top ventilator louver LH for hatchback and cowl top ventilator louver sub-assembly for hatchback and sedan. Weld the front wiper arm and blade assembly LH and RH and the cowl side ventilator sub-assemblies LH and RH onto both sedan and hatchback models together with the hood to cowl top seal for the hatchback. Finish by installing the front wiper arm head cap then conduct hood adjustments followed by wire cable connection to the negative terminal using 5.4 Nm (55 kgf-cm, 48 in-lbf) torque. Lastly check and align the front wheels.
- Q: How to remove the front Sway Bar Kit on Toyota Yaris?A:Start by disconnecting the cable from the negative battery terminal before you can remove the hood sub-assembly for the task. Begin by removing the front wiper arm head cap and continuing with the dismantling procedure on both front wiper arms with their blades. The installation process for hatchbacks requires hood to cowl top seal removal and both sedan models need removal of the cowl side ventilator sub-assembly from both sides. Start by taking out the front Wiper Motor together with its link as well as the cowl top ventilator louver sub-assembly. During the replacement process, technicians need to take away the cowl to register duct sub-assembly for hatchbacks and the front air shutter seal for sedans. The next step is to position wheels straight ahead and remove the front wheels after taking out the outer cowl top panel. You should first take off the column hole cover silencer sheet followed by the steering sliding yoke sub-assembly and the steering column hole cover sub-assembly. Tie rod ends must be separated from both left and right sides before moving on to the front lower suspension arm removal on both sides. Use a socket hexagon wrench 6 to unbolt both front sway bar link assemblies while checking if the ball joint undergoes motion with the nut. To begin the operation suspend the engine and take out the front suspension crossmember sub-assembly together with the power steering gear. Both sides require removal of front sway bar brackets while the technicians proceed to work on the front sway bar kit then its accompanying bush.

Related Toyota Yaris Parts
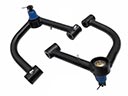 Toyota Yaris Control Arm
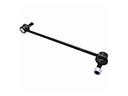 Toyota Yaris Sway Bar Link
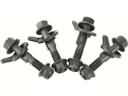 Toyota Yaris Alignment Bolt
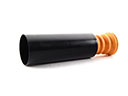 Toyota Yaris Bump Stop
 Toyota Yaris Coil Springs
 Toyota Yaris Control Arm Bolt
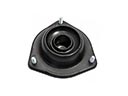 Toyota Yaris Shock And Strut Mount
 Toyota Yaris Shock and Strut Boot
 Toyota Yaris Steering Knuckle
 Toyota Yaris Strut Housing
 Toyota Yaris Sway Bar Bracket
 Toyota Yaris Transfer Case Bearing